Viewing WMS Data in QGIS
Overview
In this guide, we will load a WMS layer of sample habitats into QGIS 3
What is QGIS?QGIS is a free and open source Geographic Information System tool. To use it, you would need to install it on your computer. You can find more information on the QGIS website
Step 1: Get the Data
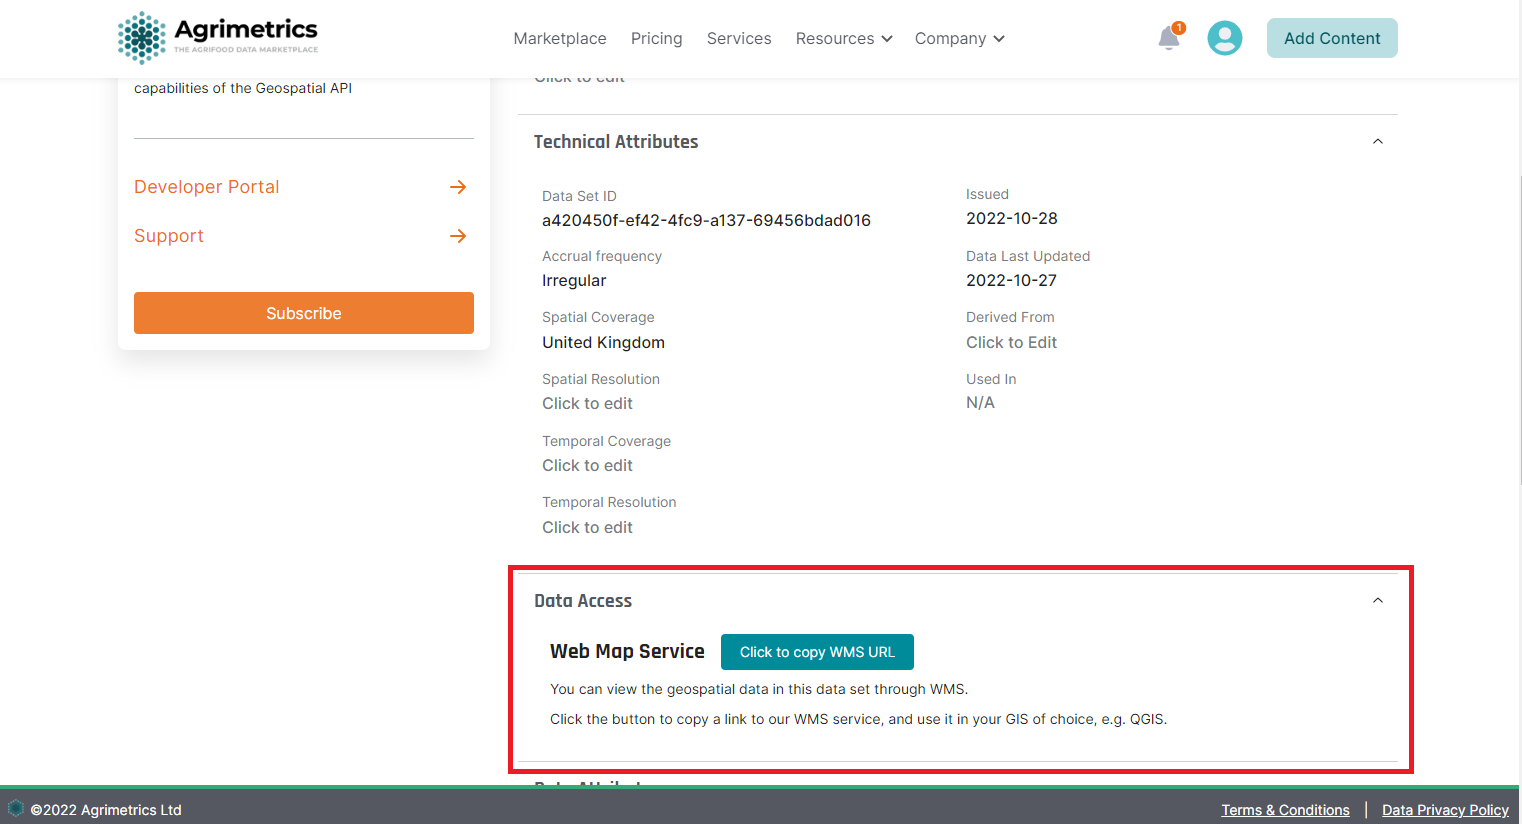
Visit the Geospatial Sample Dataset, go to the Data Access section in the Details tab and copy the WMS URL. This is the URL to the WMS which hosts the data layer.
Step 2: Procedure
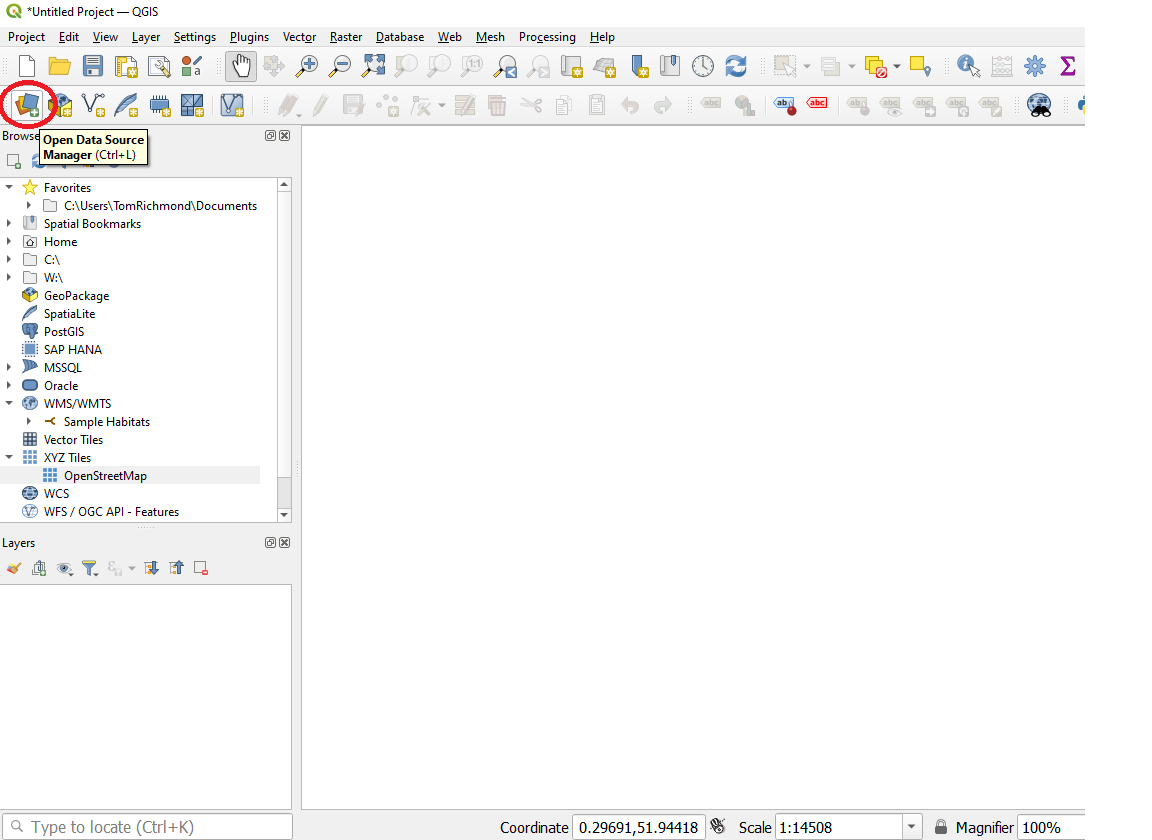
- Open QGIS and click Open Data Source Manager
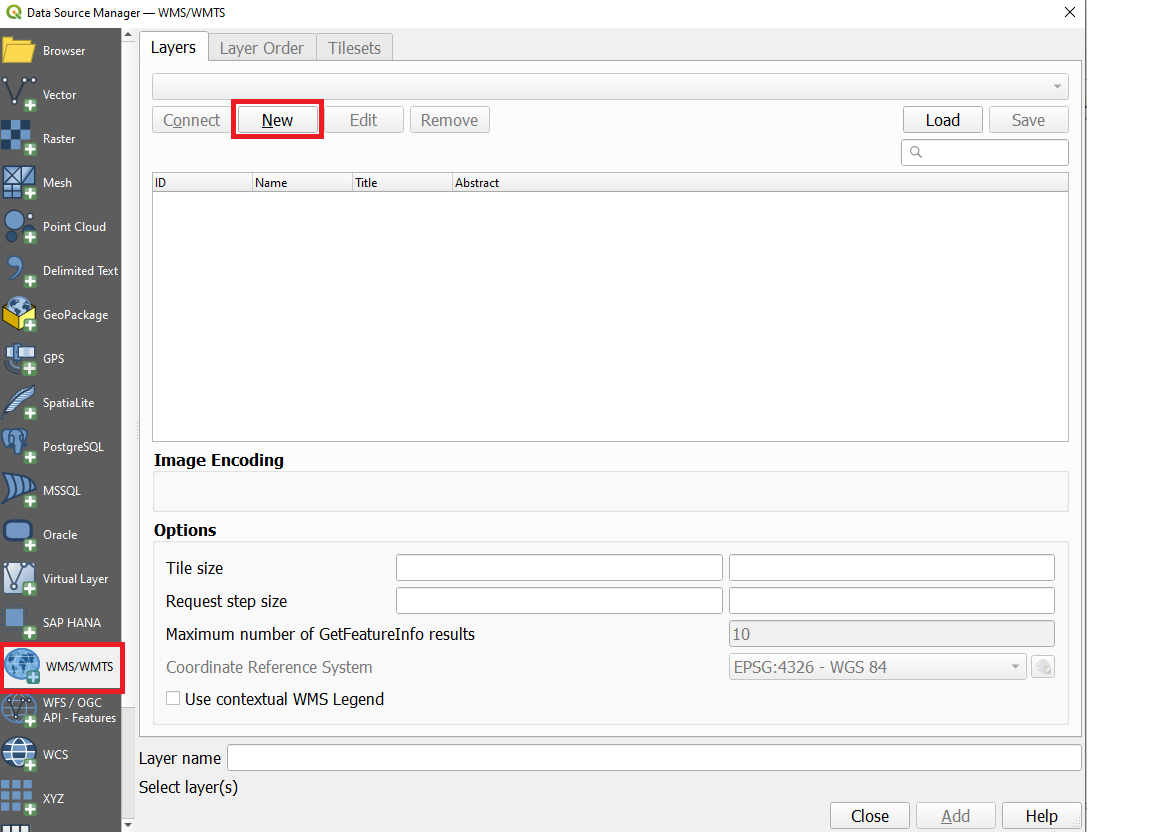
- In the Data Source Manager dialog box switch to WMS/WMTS, click New
- In the new Create a New WMS/WMTS Connection dialog box, under Connection details enter the name as
Sample Habitats, and paste the copied URL into the URL textbox.
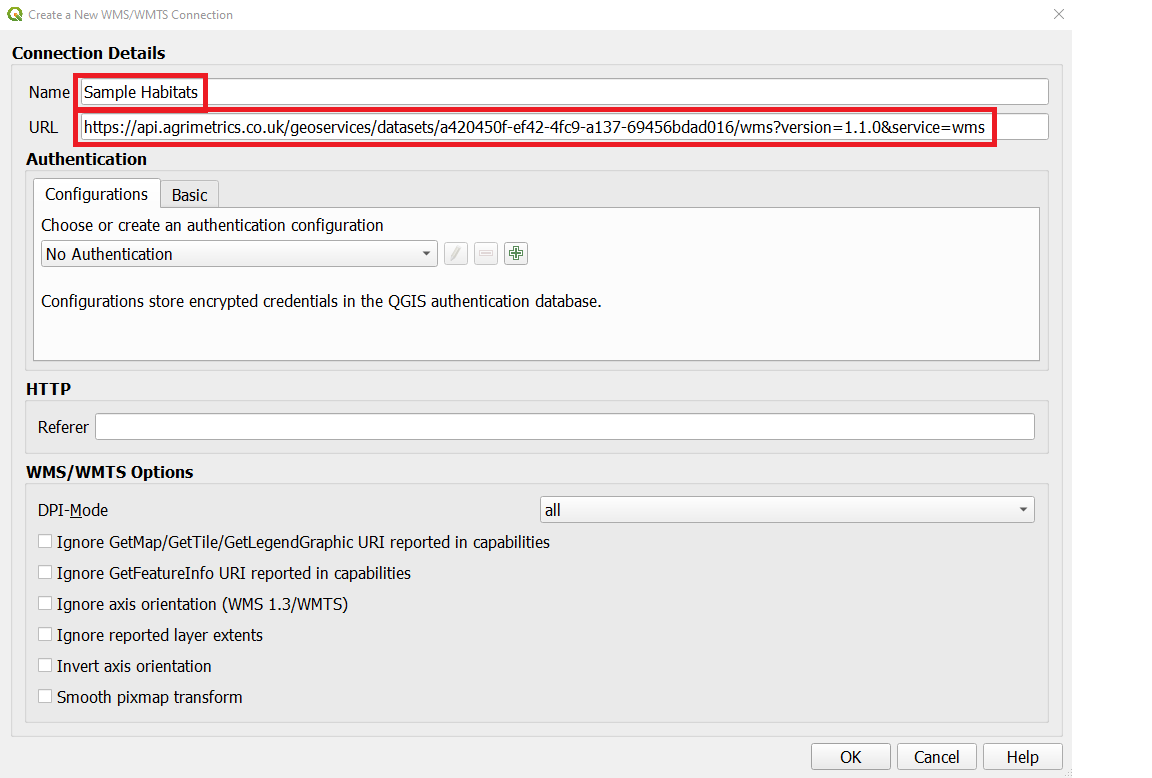
NoteYou are creating a new connection to a WMS - not a specific layer. A single service usually offers multiple layers that can be added to your project.
- In the Data Source Manager dialog box, click Connect. All available layers will be loaded.
You will notice different IDs listed next to the layers. ID 0 means you get a map of all the layers. If you do not want all the layers, you can expand the list by clicking on ▸ icon and selecting the layer of interest.
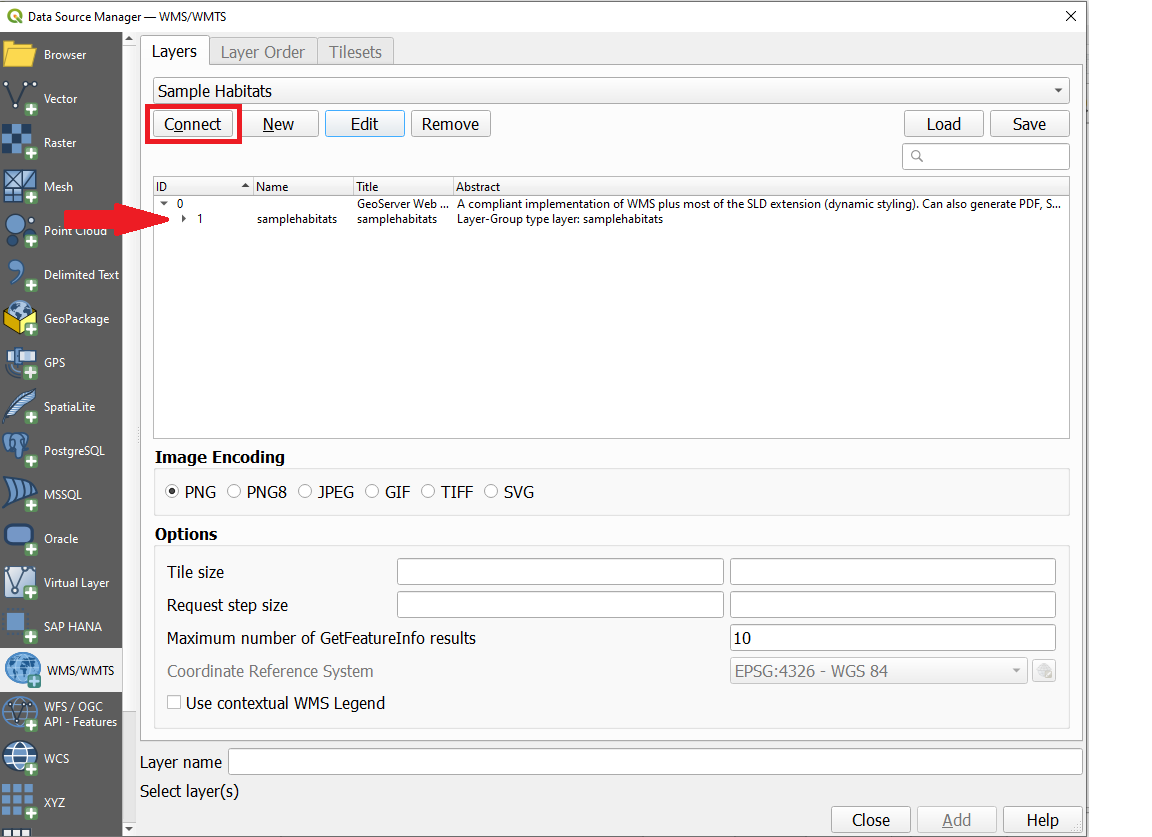
- For this guide, we are interested in the specific samplehabitats layer. Select the layer, and then click Add.
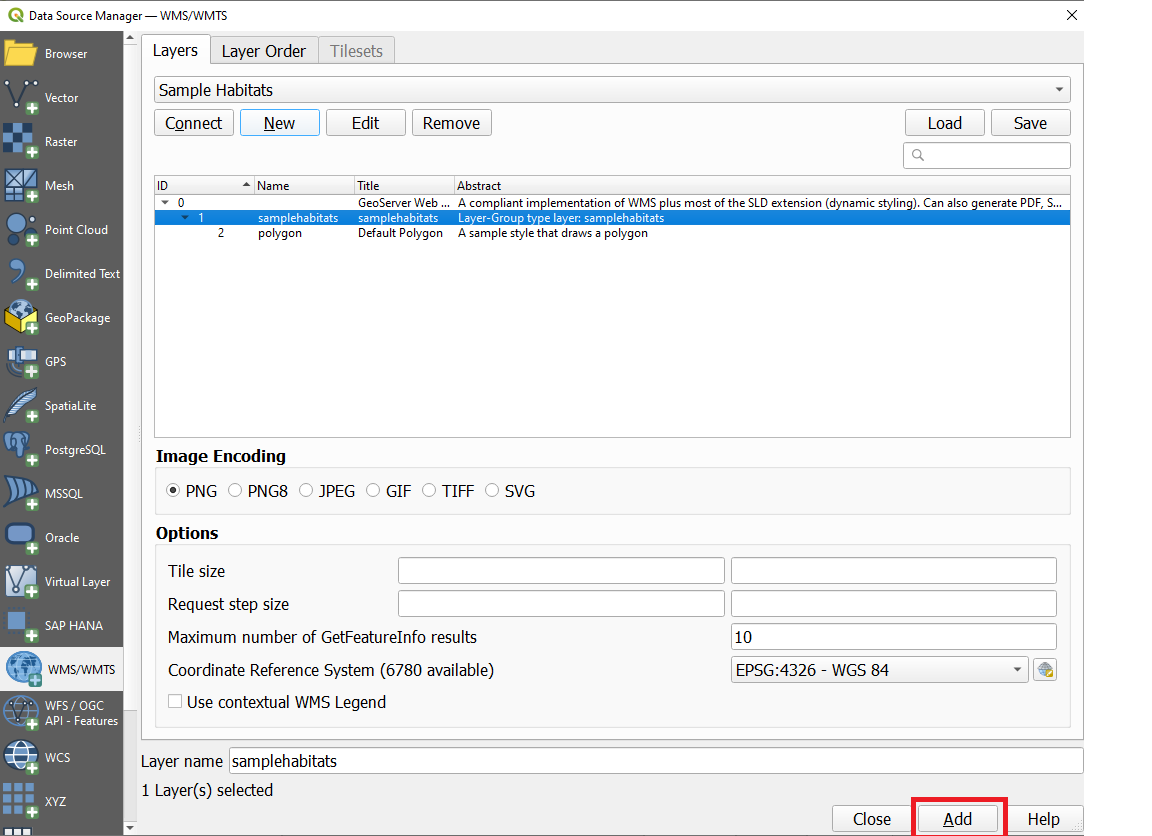
- Now a samplehabitats layer will be loaded in the canvas. Use the Zoom/Pan tools to explore the layer. WMS works by sending your viewport coordinates to the server and the server creates an image for that viewport and returns it to the client So there will be some delay before you see the image for the area after you have zoomed in. An internet connection is always required to access this layer.
Adding a basemapTo add a basemap in QGIS 3 see link
You can refer to the other steps in this tutorial for more detailed instructions on how to interact with the layer.
Updated 5 months ago
