Applying Styles to a Layer
When you first ingest geospatial data, and view it through WMS, you'll find that there is not an appropriate colour scheme or legend.
To fix this, you'll need to apply an SLD file to the layer(s).
Step 1: Generating an SLD file
In order to apply a style to a layer, you'll first need the SLD file. The easiest way to generate one is using GIS software like QGIS. The Geoserver documents have a page on how to generate these styles.
Step 2: Apply the style to the layer
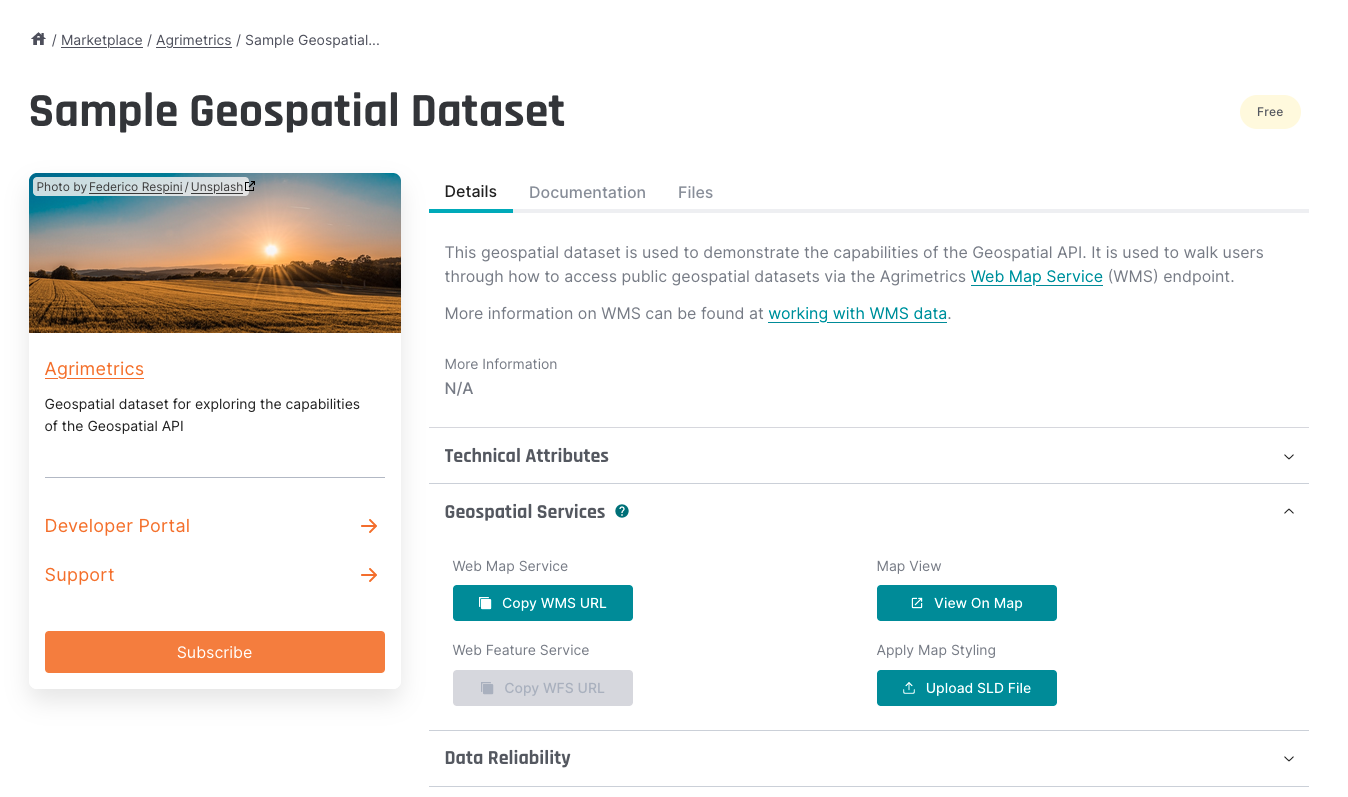
Once you have your SLD file, you can apply the style to a layer in your data set. To do this, first go to the data set in the marketplace. You'll find the "Upload SLD File" button in the geospatial services section, seen below:

Geospatial Services view
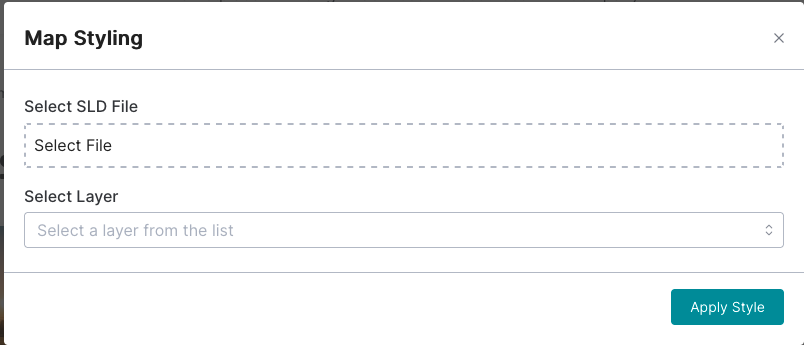
Clicking this button will then open the Map Styling modal. Here, you can choose your SLD file, and which layer you would like to apply the style to.

SLD Style Selector
If successful, you will be able to now see the updated style in the explore view in the marketplace. See Viewing WMS Data in the Catalogue for more information.
Updated 5 months ago
